To set up your Email Plus account on an Android phone or tablet, follow the steps for your make:
Google
- From the Home screen, click Settings icon
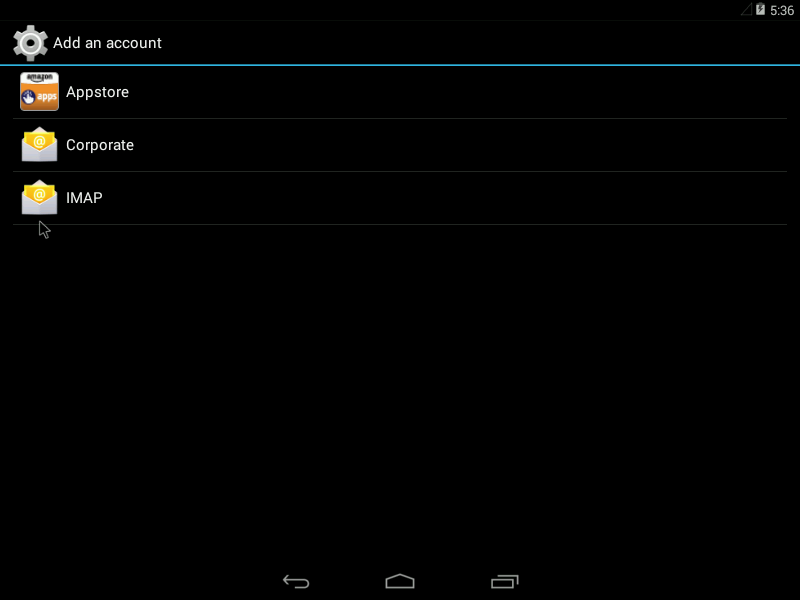
- Select "Add account"
- Select Corporate

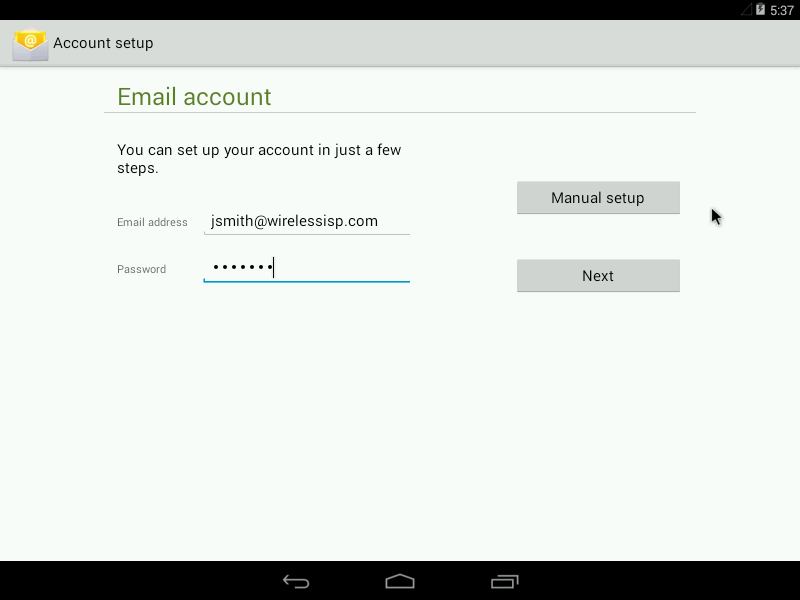
- On the following screen, enter your full email address (e.g. このメールアドレスはスパムボットから保護されています。閲覧するにはJavaScriptを有効にする必要があります。) and password and click, "Manual Setup"

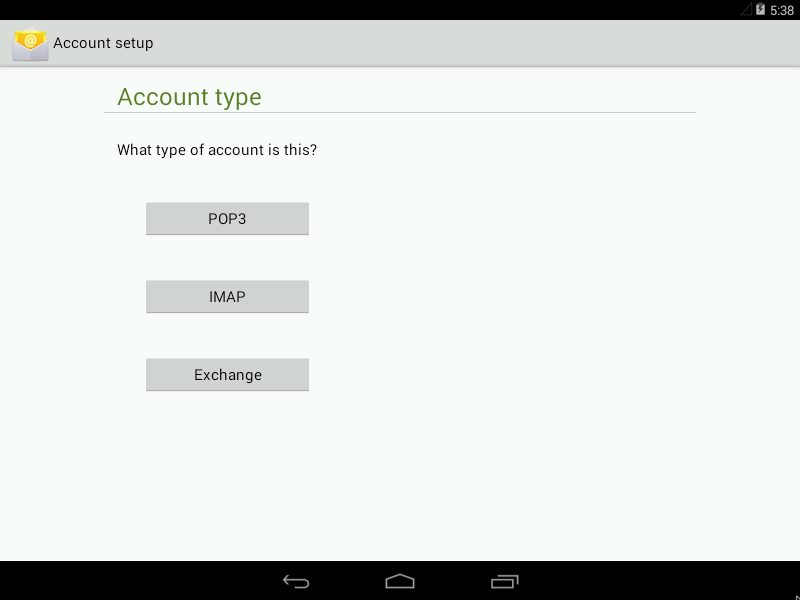
- Select Exchange

- One the following screen, enter and verify the following information:
- Username: Enter your entire email address (e.g. このメールアドレスはスパムボットから保護されています。閲覧するにはJavaScriptを有効にする必要があります。">jこのメールアドレスはスパムボットから保護されています。閲覧するにはJavaScriptを有効にする必要があります。)
- Password: Password used to log into Email Plus
- Server: sync.securedurl.com
- Security Type: SSL/TLS
- Port: 443
- Click Next
- The following screen are personal settings you can set at your own discretion.
*This article is based on Android 4.4.2 from the Android SDK.
Samsung
- From the Home screen, click Settings icon
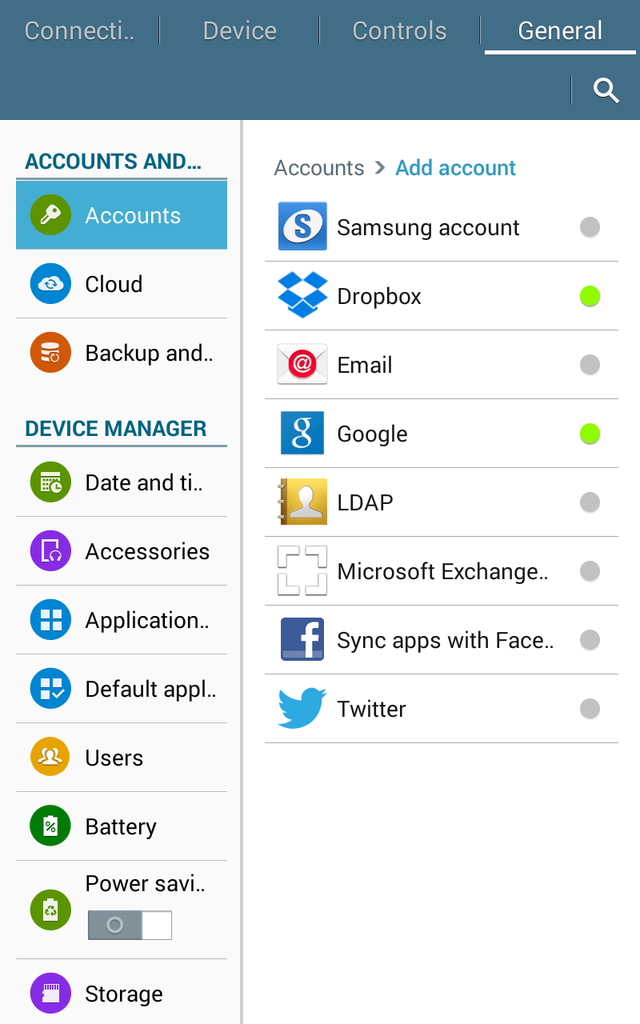
- Select "Add account"
- Select Microsoft Exchange ActiveSync

- On the following screen, enter your full email address (e.g. このメールアドレスはスパムボットから保護されています。閲覧するにはJavaScriptを有効にする必要があります。) and password and click, "Manual Setup"
- One the following screen, enter and verify the following information:
- Username: Enter your entire email address (e.g. このメールアドレスはスパムボットから保護されています。閲覧するにはJavaScriptを有効にする必要があります。">jこのメールアドレスはスパムボットから保護されています。閲覧するにはJavaScriptを有効にする必要があります。)
- Password: Password used to log into Email Plus
- Server: sync.securedurl.com
- Security Type: SSL/TLS
- Click Next
- Your device may prompt you for activation:
- The following screen are personal options you can set at your own discretion.
*This article is based on Android 4.4.2 running on a Samsung Galaxy tablet.
HTC
- From the Home screen, click Settings icon
- Select "Add account"
- Select Microsoft Exchange ActiveSync
If you are already in your mail client, you can tap the top right to access "Add Account" - One the following screen, enter and verify the following information:
- Username: Enter your entire email address (e.g. このメールアドレスはスパムボットから保護されています。閲覧するにはJavaScriptを有効にする必要があります。">jこのメールアドレスはスパムボットから保護されています。閲覧するにはJavaScriptを有効にする必要があります。)
- Password: Password used to log into Email Plus
- Server: sync.securedurl.com
- Security Type: SSL
- Click Next
- The following screen are personal options you can set at your own discretion.
- Lastly, name your account for easy reference.
*This article is based on Android 5.0.2 running on an HTC One M8.